Manipulating Time and Space
Our task:
Our task is to demonstrate how editing can be used to manipulate time and space. We are going to film and edit a short sequence that includes either a memory or a flashback and use post-production (editing) techniques to make clear to the audience that the time and space in the sequence has changed.
We are to work in a small group for this task. We also have to assign the following roles:
- Director
- Camera Operator
- 2 X Actors
Screen Grabs from Adobe Premiere Pro to show the following:
- Uploading the footage
- Organising/labelling clips in bins
- Using a range of editing tools. E.g. cropping, adding transitions, layering
- Using audio. e.g. layering, manipulating audio levels
- Converting the file format/exporting the film
Converting the file format/Exporting the film:
To export the video to youtube, I would have to change this video's format into youtube's format that way it will allow me to upload it in Youtube.
To do this you will have to go to file then down below you should be able to see 'Export' and by clicking into it you will see another column with a range of different options: Media, Title, Tape, EDL, OMF, AAF and Final Cut Pro XML. You are to choose the Media option and that will then bring you up to the next task.

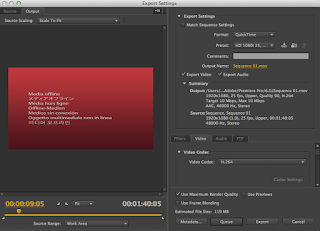
This is what comes up after clicking the 'media' option. This setting will let you choose different ways you can use to upload it to different sites.
NOTE!:
Before you do anything else in this setting you have to make sure that the timeline's duration beginning starts to 00:00:00:00. In the figure (at the left) it says 00:00:09:05 i will have to change this to all 0's to make sure every scene will be uploaded.

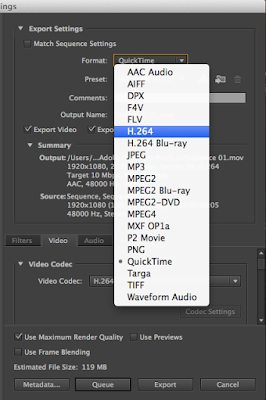
After making sure that the timeline starts with 00:00:00:00 you can now change the format in the style Youtube allows. In this case i have chosen the format 'H.264'. This will then allows me to upload my video in Youtube.
After choosing the format you wanted you can now then
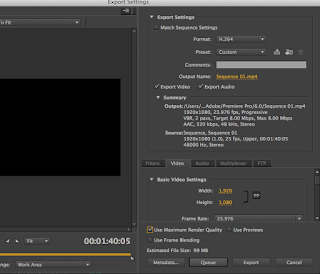
chose the preset in where you would like upload the video you had made from Adobe Premiere Pr. In my case, i chose 'Youtube HD 1080p 23.976' because i would like to upload this video to my Youtube account so that i will then be able to transfer it in my blog.

After choosing the format and preset you wanted you can now then start to queue your video. Just to make sure everything was right, go and have another check-through everything just in case you might have missed a step. You can no click on 'Queque' down below.
Using audio: Fade
In my video for Manipulating Time and Space i have added an audio to create a time when going back to past.
This is screen grab i took from the time when i had already uploaded my video in Youtube.
This is the start of fade transition. I had screen grab the duration in where it still has the first scene and at the same the fade transition is occurring.
This is the transition fade that is in between my two video scenes.
I use fade transition to present that the time is going back to past.
This is then the transition fade that comes after the black-out. This is the time where it jumps from scene one to scene two. You can still see the fade along with it that presents that time had moved backwards and we are now in the past.
This is now same scene from above but this doesn't have the fade transition along with it anymore as it has already jump from present time to past time.
Using audio: Dissolve

In my video i had included the use of dissolve in between two different scenes.
I have used a dissolve because it looks effective to have a dissolve included than a video clip going straight without any use of audio.
I used dissolve to make the video scene before dissolve appears and the video scene after dissolve appear look like it had jump in another time.
This is what a dissolve look like. You can see two image in silhouette style. This is the effect dissolve audio shows.
Using a range of editing tools: Cropping
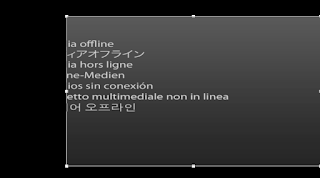
Those yellow numbers that you can see from the image shown at the left side are the numbers that will then change your video. If the number in the row of left is changed from 0.0% to 2.0% that means your video clip will be cropped at the left.

This is what a crop editing tool look like when it has been cropped in the top, bottom, left and right.
Story Behind the video:
A group of friends used to be really close with each other that they always hang around after school. However, one day of them got into a relationship and ever since then they don't hang around that much anymore as they used to before.
One day when they were in a classroom together they didn't talk with each other and thats when the past time comes in, in this video. the past time shows what before the time they are right now happened. In the past time, it shows when one of them (me) asked if they would like to go to cinema together as they used to do this quite often at the past. However, one of them (Allegria) didn't want to come because she'll be with her boyfriend then one (Jasmine) couldn't take this anymore therefore the argued.
After the past time scene it jumps back in the present time where they talk about this.


